 I just bought a new computer (8 GB RAM! quad-core! hurrah!). I had my old computer for seven years, and I use it for a lot of different applications, so there’s a lot of pain to go through before I get the new one working the way I want it to.
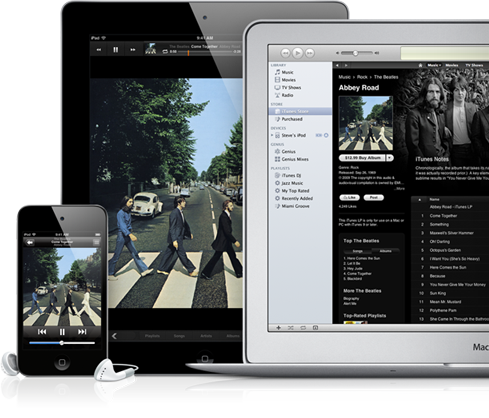
One of the biggest pains is iTunes. Apple provides a number of ways to move an iTunes library here. What they don’t tell you is that there’s no magic way to successfully move all your content, all the information you’ve collected in your iTunes database, and all your configuration settings. Apple thinks barely adequate tools are good enough. I’ve written this post to try to clarify the migration process for the other poor souls who will be following me.
No matter what you do, you’re going to have to re-configure iTunes, and you’re going to lose your play counts, “Date added” and “Last played” records, along with other useful, but not necessarily critical, information. All your music will be “checked” so if you’re using “only sync checked items”, you’ll need to reset your selections. And unless you’ve been very careful, or you have a small, fairly new, iTunes library, you’re going to lose some cover art.
I can live with that, but what I can’t live with is that you also lose your ratings. So I use Apple’s process, but I added a few steps to make it easy to recover my ratings.
As usual, there’s a lot of BS out there on the Internet to confuse things. There are also plenty of vendors who will sell you a utility to move your library, but none of those can do a better job and many of them will increase your risk of trashing your library.
If you’re interested in why this process is so hard, this post by Jessie Hollington goes into exhaustive details. He’s writing about moving to a new disk (usually so you can have more room), but a lot of the explanation is relevant.
(Note: I use Windows, but things are pretty much the same on a Mac. And you can use the method below to move your library from one OS to the other)
(Another note: If you use iCloud, there may be a better way to do all this. But if there is, Apple doesn’t mention it.)
(A third note: I’m assuming you use iTunes to manage your music and you don’t need to store your music files in a special folder structure to work with another application. If that’s not the case, you’re on you own.)
(…And fourth: none of my songs have DRM and none of them ever will. Among other things, that lets me back them all up just in case.)
- Make sure iTunes is up-to-date on your old computer. Ideally, you’ve been doing this all along.
- Back up your old computer. Ideally, you’ve been doing this all along.
- Create 5 new Smart Playlists, one for each rating from 1 to 5 stars.
- Open your one-star Smart Playlist.
- Choose Edit->Select All to highlight the entire playlist.
- Choose File->New Playlist from Selection, then name the new playlist “1 star”.
- Repeat steps 4 through 6 for your 2,3, 4, and 5 star content.
- Delete the 5 Smart Playlists you created in step 3.
- Get the new computer set up and connect it to the same home network as your old computer. If you only have one computer and you don’t have a home network router that lets you share your Internet connection, get one. If you’re not connected to the Internet at all, how are you reading this?
You can move your library without a network, but you’ll need external storage large enough to hold everything and you’ll need to copy it all twice. Setting up a home network is faster, cheaper, and easier. Really. Especially if you have a large library. - Install iTunes on the new computer.
- Start iTunes, and select Edit->Preferences->Advanced. Make sure that “Keep iTunes Media folder organized” and “Copy files to iTunes Media folder when adding to library” are both selected. This isn’t absolutely necessary, but if everything is in one place according to Apple’s default plan, if you ever need to restore your library or move to another new computer, you’ll be more likely to be successful.
- Go to Apple’s iTunes: How to move your music to a new computer page and follow the “Home Sharing” instructions. Make sure you include the steps to move your playlists.
- Once everything is on the new computer (ta-da!), go to the 1 star playlist, select all the songs, choose Rating from the File menu, and and give them all a 1 star rating. Repeat for the 2,3,4,and 5 star playlists. Once you’re done, delete the playlists.
Once your library is set up on your new computer, you’ll want to move your iDevices to the new system. I had to migrate my 6th generation nano and my iPhone 4. Neither device can connect to multiple libraries, so once you start to move, you can’t go back. And again, Apple hasn’t made it easy.
When I plugged my nano in to the new computer and synced it, I got the “Erase and sync” to move to a new library dialog. But after I allowed that, I still couldn’t sync properly. iTunes told me that “Song Title was not copied to the iPod iPod Name because it cannot be played on this iPod” and “Some of the items in the iTunes library, including Song Title, were not copied to the iPod iPod Name because they cannot be played on this iPod,” along with a long list of songs that didn’t sync. All of them were perfectly good DRM-free MP3s that I downloaded or ripped myself. Theyall played properly in iTunes.
I “Restored” the nano to its original factory settings. After that, I was able to sync.
My experience with the nano made me leery of blindly plugging in my iPhone, so I poked around a little and found this post from wjosten in the Apple forums, which provided some guidance.
- In iTunes, go to Edit->Preferences->Devices and select “Prevent iPods, iPhones, and iPads from syncing automatically”.
- Connect your iPhone, but DO NOT SYNC.
- Next, go up to Store->Authorize this computer to make sure you’re connected with your iTunes Store account. You should have done this earlier.
- Then, select File->Transfer Purchases, which will move your apps to your iTunes library.
- Right-click on your iPhone in the device pane and select Reset Warnings.
- Right-click again and select Back Up. Make a note of the time (it was 3:18).
- From the Summary screen for your iPhone, select Restore to wipe the phone and reload the original settings.
- When prompted, restore your iPhone from the backup you made in step 6. When you started the Restore, iTunes made another backup, so you have to be careful not to use that one. On my system, the backup I wanted was named “iPhone”, while the other was named “iPhone – Apr 19, 2012, 3:36PM”.
- Once that is complete and your phone has reappeared in iTunes, configure your iPhone so it syncs the desired content (I sync apps, music, tones, and books), then sync to load the content from your library to your phone.
wjosten warns you to make sure you have at least one contact & one event in whatever supported program you use before you back up your phone. That didn’t seem to apply to me, since I sync contacts and my calendar with Google Apps.
Two more notes:
If you’re getting rid of your old computer, or if you won’t be using iTunes on it in the future, don’t forget to “Deauthorize” it from the iTunes Store before uninstalling iTunes or getting rid of the computer.
Don’t forget backups on your new computer!
Good luck! If you have any comments, feel free to post them below.
I had this issue a while back, so I rebuilt mine from scratch to live off of an external hard drive. Now all I have to do is make sure that it maps to “G:” whenever I connect it to the laptop or the home desktop. This is very useful and very comprehensive. Thanks for posting.
Pingback: news
My daughter has an iPod (4th gen). We recently moved her iTunes account from the family desktop to her laptop. Everything seemed fine, until she tried to transfer apps from her library that weren’t previously on her iPod. When she tries to transfer, the following message comes up “The app ‘cows space’ was not installed on the iPod “Lila’s iPod’ because the app could not be found.”. If anyone has had this issue and knows how to resolve it, I would appreciate your help.
Thanks for finally writing about >Moving Your
iTunes Library to a New Computer | Y42K? <Loved it!